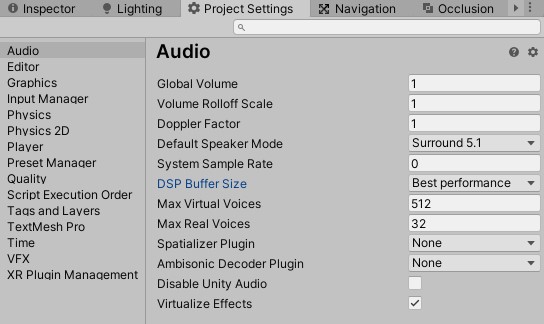
Unity Audio Delay Bug
If there is am audio delay, go to 'Project Settings -> Audio -> DSP Buffersize' and set it to 'Best Latency'. This delay also happens with Bluetooth speakers or headphones.
Unity Particles Inherit Velocity Bug
When setting a particle system to inherit initial velocity from the emitter, the particles cannot be emitted at start. Set a delay to something like 0.01
Unity Euler Angle Wrapping
When setting euler angles to set transform rotation, remember to subtract 180 from any axis that is greater or equal to 360.
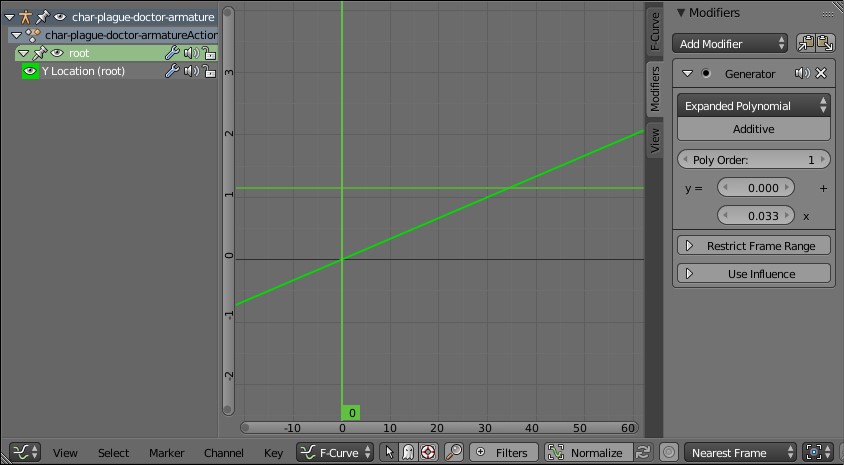
Blender f-curve Modifiers
When making some looping movement when you do not want the root animation to be in the final animation, like a walk cycle, f-curve modifiers can do non-destructive root movement for you.
Blender Crease Maps
To make a crease map, flip the normals towards the inside of the mesh and bake the AO. Make sure the AO distance is small enough.
Detail and Scale
To make an object look big, give it lots of detail to shrink its "atom" size.
Blender Non-Destructive Mesh Variation
To give a mesh "random" variation without permanently skewing the mesh, use the displacement modifier with a cloud texture.
Unity Execute Always
The ExecuteAlways attribute will only work on GameObjects with no parent; they have to be in the main stage.
Unity GameObject to Prefab
GameObjects instantiated in-game are not connected to their original prefab. Use this editor tool to restore the prefab link. (alt link)
Unity Editor Scripts
If any editor tools are added, put them into an "Editor" folder that is a child of the "Assets" folder. Unity will exclude this folder from the build. Also applies to "Plugins".
Convincing Melee Enemies
Have some enemies attempt to flank if in a group. Having enemies stare at the player as they avoid obstacles (with LOS, of course). At distance, enemies can break into a run or jog (can override staring).
Unity Root Motion
In the blend importer rig tab, choose to create a avatar from model and select the root bone (most likely hips is the best root-deform bone). In the blend import animation tab, you can choose what part of the root motion you want to bake out per animation: rotation, Y, or XZ. Make sure to use the avatar on the animator component.
Blender To Unity Export (2.9)
To properly export blends, armatures included, open the export .FBX options in Blender. Set the scale to 0.01. In the armature tab, set the primary bone axis to Z and the secondary bone axis to -X. Turn off leaf bones. The objects still require their rotation to be applied at -90 on the X axis though.
Convert linked duplicates to unique meshes in Blender (2.9)
To use linked duplicates as level kits to later merge meshes, the linked data needs to be made unique. This can be done by going to Object -> Relations -> Make Single User -> Objext and Data. Now that the linked duplicates have their own unique meshes, they can be joined into a bigger level mesh.
Godot 4 - Change Node3D's Parent
If the node just has its parent changed, it will not respect its old global transform values.
						var childGlobalPosition = myNode.GlobalPosition;
						var childGlobalRotation = myNode.GlobalRotation;
						myNode.GetParent().RemoveChild(myNode);
						GetTree().CurrentScene.AddChild(myNode);
						myNode.GlobalPosition = childGlobalPosition;
						myNode.GlobalRotation = childGlobalRotation;
Turbulance VS Time with Trig Functions
Time should not be used to define the frequency of the trig waves. To add an independant turbulance to the waves, there needs to be another input that defines the wave. For something like a shader, the world position is usually used. Time then needs to be used to travel down the defined wave. Here's a sample:
wave = SIN(position / turbulance + time * speed) * amplitude

